HOT PRODUCT
Product Details
the Diy Guide To Installing Semi-flexible Solar Panels
The DIY Guide to Installing Semi-Flexible Solar Panels
Solar energy has become an increasingly popular and affordable option for homeowners seeking to reduce their carbon footprint and save on energy costs. One of the most versatile options for harnessing solar power is through the use of semi-flexible solar panels. These panels are lightweight, flexible, and highly efficient, making them an excellent choice for a variety of applications such as RVs, boats, and even residential rooftops. In this DIY guide, we will provide you with step-by-step instructions on how to install semi-flexible solar panels, allowing you to embark on your journey to a greener and more sustainable future.
Step 1: Determine Your Power Needs and Location
Before you begin the installation process, it is important to assess your power requirements and select an appropriate location for your solar panels. Calculate your energy consumption by reviewing your utility bills and consider how much power you wish to generate from solar energy. Additionally, identify a suitable space with optimal sun exposure, free from obstructions such as trees or buildings, that allows for easy access to the panels.
Step 2: Gather the Necessary Tools and Materials

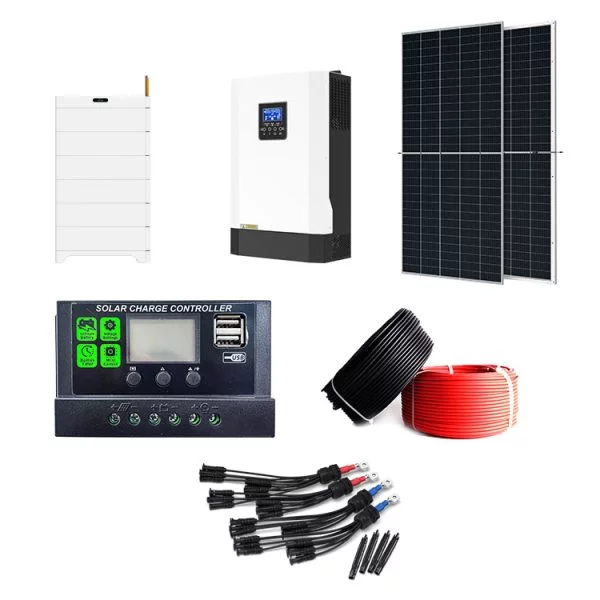
To install semi-flexible solar panels, you will need the following tools and materials:

– Semi-flexible solar panels
– Solar charge controller
– Deep cycle battery
– Inverter (if desired)
– Mounting hardware, including brackets, screws, and sealant
– MC4 connectors and cables
– Wire cutter/stripper
– Drill
– Screwdriver
– Silicone sealant
Ensure that you have all the required tools and materials readily available before beginning the installation process.
Step 3: Mount the Solar Panels

Start by positioning the solar panels on the desired surface and mark the mounting hole locations. Ensure that the panels are placed in the desired orientation, facing the sun, and avoid any shading or obstructions. Drill pilot holes at the marked locations and secure the panels using the appropriate mounting brackets, screws, and sealant. It is crucial to follow the manufacturer’s instructions regarding the installation of the panels.
Step 4: Connect the Solar Panels
After mounting the solar panels, it is time to connect them to the charge controller. Use MC4 connectors to create a watertight seal between the panels and the cables. Connect the positive (+) and negative (-) terminals of each panel to the corresponding terminals on the charge controller, following the recommended wiring order provided by the manufacturer. Ensure that all connections are secure and tight.

Step 5: Connect the Charge Controller and Battery
Connect the charge controller to the deep cycle battery, which stores the solar energy for later use. Connect the positive (+) and negative (-) terminals of the battery to the corresponding terminals on the charge controller, again following the manufacturer’s instructions. Be cautious and observe proper polarity to avoid any accidental short-circuits or damage to the system.
Step 6: Optional – Connect an Inverter
If you wish to convert the stored DC (direct current) energy into AC (alternating current) for powering household appliances, connect an inverter to the charge controller and battery. Again, follow the manufacturer’s instructions and ensure proper polarity during the connections.
Step 7: Test and Inspect
After completing the installation, carefully test the system and conduct a comprehensive inspection to ensure everything is working correctly. Check for any loose connections, potential leaks, or other signs of damage. Verify that the solar panels are generating electricity and charging the battery as expected. If any issues arise, consult the manufacturer’s troubleshooting guide or seek professional assistance.
Installing semi-flexible solar panels can be a rewarding DIY project that not only reduces your environmental impact but also provides long-term cost savings. By following this guide and consulting manufacturers’ instructions, you can successfully harness the power of the sun and enjoy the benefits of renewable energy. Remember to prioritize safety and seek professional help if you are uncertain about any aspect of the installation process. Good luck on your solar journey!


